Equipment takes hits — a dropped enclosure, a hard knock during installation, a vibration event in transit. Most of the time the housing looks fine and the assumption is that everything inside is too. The problem with a Waterproof Breathable Valve is that impact damage is not always visible from the outside, and a valve that looks intact may have already lost either its pressure equalization function, its waterproof membrane integrity, or both. By the time moisture ingress shows up on the electronics inside, the damage has been done. Catching a failed valve before that point is the practical goal — and it requires knowing what to check and how.
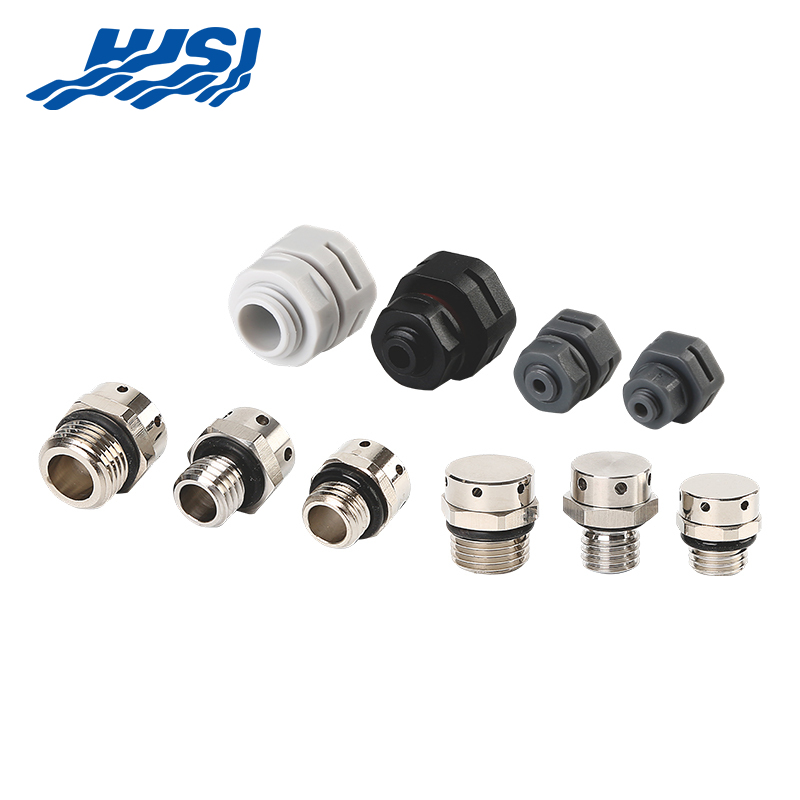
Before running a post-impact check, it helps to be clear on what the component is supposed to do. The valve serves two functions simultaneously:
The membrane at the core of the valve is what makes both functions possible. It is a microporous material — the pores are large enough to allow gas molecules through but too small for liquid water droplets to penetrate under normal pressure conditions.
When that membrane is compromised, one or both functions fail. The enclosure either stops breathing — which leads to pressure buildup and condensation — or it stops being waterproof, or both.
Not all valve failures come from impact. Contamination, chemical exposure, and age all degrade membrane performance over time. But impact is a distinct risk because the failure mode is different:
A valve that passes a visual check can still have failed in any of these ways.
Start with what can be seen directly. A visual check will not confirm the valve is working, but it can confirm obvious damage that makes further testing unnecessary.
Check for:
If any of these are present, the valve should be replaced without further testing. A damaged valve that appears to function during a bench test may still fail under actual operating conditions.
A valve that looks intact after impact should be tested for breathability before the enclosure is returned to service.
A basic test for breathability:
If the membrane feels completely blocked and no air passes through, the pores have been contaminated or the membrane has fractured in a way that has closed the pore structure. Either condition means the valve is no longer functional.
A more controlled test for pressure equalization:
If pressure holds without equalizing, the membrane is blocked. If pressure drops immediately and does not hold at all, there may be a structural breach rather than just membrane blockage.
Breathability alone is not sufficient — a valve that breathes but no longer excludes water has failed its primary protective function.
This check should be done carefully and only when the valve is properly installed in a sealed enclosure:
If moisture is found near the valve after a water exposure that the enclosure previously handled without issue, the valve membrane or the thread seal has been compromised.
For a removed valve, a simple check:
If bubbles appear easily, the membrane has been physically breached.
| Symptom | Likely Cause | Action |
|---|---|---|
| No airflow through membrane | Pore contamination or membrane fracture | Replace valve |
| Pressure does not equalize | Membrane blocked or body cracked | Replace valve |
| Moisture inside enclosure near valve | Membrane breach or thread seal failure | Replace valve and inspect thread seat |
| Visible membrane damage | Direct impact to membrane face | Replace valve |
| Thread damage on valve body | Impact to installed valve | Replace valve and inspect enclosure thread |
| Condensation increasing inside enclosure | Breathability lost — pressure cycling not occurring | Replace valve |
A non-functional valve left in service creates conditions that worsen progressively:
The valve is a small component, but its failure affects the entire enclosure system.
Not every impact warrants a full functional test. Some situations call for immediate replacement:
For lower-severity impacts — minor knocks during handling, for example — a visual check followed by a basic breathability test is a reasonable approach before deciding whether replacement is necessary.
It does, and this is worth considering when assessing a valve after impact. A valve that was correctly installed — torqued to the specified value, with the thread seat clean and undamaged — has better resistance to impact-related seal failure than one that was over-torqued, under-torqued, or installed into a damaged thread seat. If a post-impact inspection reveals thread damage at the enclosure side rather than on the valve itself, the installation point needs repair before fitting a replacement.
A Waterproof Breathable Valve that has been through an impact event should not be assumed functional until it has been checked. The membrane is engineered to handle environmental stress over time, but physical shock is a different load type — and the failure modes it causes are not always visible from the outside. For engineers and maintenance teams managing sealed enclosures across industrial installations, having reliable replacement components on hand shortens the time between identifying a failed valve and returning equipment to service. Zhejiang HJSI Connector Co., Ltd. manufactures Waterproof Breathable Valves and related sealing components for industrial enclosure applications. If you are reviewing your current valve specifications, sourcing replacements after an impact event, or evaluating options for a new installation, contacting their technical team is a practical way to confirm product compatibility and availability for your application.

2nd Floor, Building 2, No. 188, Punan 3rd Road, Economic Development Zone, Yueqing City, Wenzhou City, Zhejiang Province, China

Copyright @ Zhejiang HJSI Connector Co., Ltd. All rights reserved.

China Waterproof Breathable Valve Manufacturer
 +86-15858552966
+86-13356176555
+86-15858552966
+86-13356176555

 English
 русский
 عربى
عربى